Downgrading your iOS Device
Author: MPG13
Downgrading allows you to go to one iOS version to another, regardless of wether or not Apple is signing that version
Requirements:
Compared to 32-bit devices, 64 bit devices are very heavy on security. The most major way is within the SEP. This handles some security processes on the device, most notably touchID and FaceID. It runs its own OS, which is also signed by Apple. sepOS must be compatible with iOS for a successful restore process.
- SHSH Blobs
- Signed SEP
- Device Capable of setting nonce NOTE: (This can be done with NonceSet or V0rtexNonce, but this tutorial will demonstrate with System Info)
- IPSW for target iOS version
- Machine running Mac OS or Windows
Instructions:
Follow this tutorial with the YouTube video here!
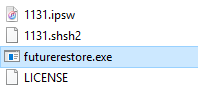
- Download the latest FutureRestore from Encounter's GitHub
- Put the .IPSW and .SHSH in the same folder as the FutureRestore executable. NOTE: For simplicity, name each file according to the iOS version you wish to go to (1131.ipsw & 1131.shsh2, if you were restoring to iOS 11.3.1)
- Find your generator. Do this by finding the generator key in your shsh2 file (looks similar to 0x000000000000, where the zeros are numbers and letters)
- Set your nonce. You need the Cydia tweak "System Info" installed. Open Settings, go to General>About and find the cell labeled "Boot-nonce". Swipe life on it and tap "Set nonce". Enter your Generator exactly as it appears in your blob file. Confirm your generator and press ok.
- With your device plugged into your computer, put your device into recovery mode, also from the command line:
nvram auto-boot=falseandreboot - On your computer, open Command Prompt (Windows) or Terminal (macOS) to the location in which FutureRestore is located
- inside your command shell, enter the following, substituting the text in brackets with their appropriate replacements:
On macOS:./futurerestore -t [SHSH2 blob File] --latest-sep --latest-baseband [IPSW File]
On Windows:futurerestore -t [SHSH2 blob File] --latest-sep --latest-baseband [IPSW File]
NOTE: The-tspecifies the apticket or "blob" filepath. The--latest-sepand--latest-basebandspecifies that FutureRestore should use the latest sepOS and baseband provided by Apple. If you are restoring a device without cellular capabilities, use--no-basebandinstead of--latest-baseband. - Allow FutureRestore to run uninterrupted. You will see a lot of verbose text and progress bars appear. The process will be completed when you see
DONE done: restoring suceeded.and FutureRestore quits. - At this point your phone should restart, and begin the setup process as if you had performed a regular restore.
Run into any issues? Check out FutureRestore's Issues Page or search the subreddit for help!